The ACME Guide: 64-bit Ubuntu 8.04 LTS Hardy Heron Edition - Part 4
Posted on June 17, 2008
We’re in the final stretch. We’ve got Apache, ColdFusion and MySQL up and running. Now we need a way to write some actual ColdFusion code in Linux. For that, we need the Eclipse IDE and a few plug-ins, primarily CFEclipse.
Downloading Eclipse
It’s possible to install Eclipse through the Synaptic Package Manager, but when I used it in Ubuntu 7.10, the version of Eclipse it installed was a version behind current. Let’s get the latest version of Eclipse directly from Eclipse.org. On the front page, you should see a big “Download Eclipse” button. Click that and you’ll get links to the version of Eclipse that’s right for your OS. In our case, we’re going to get Eclipse Europa (Eclipse v3.3) for Linux x86_64. You can choose either of the top two options:
- Eclipse IDE for Java Developers (79 MB)
- Eclipse IDE for Java EE Developers (126 MB)
I’m going to grab the larger download for Java EE Developers because, well, why not? It’s free. The file I’m downloading is called `eclipse-jee-europa-winter-linux-gtk-x86_64.tar.gz`. This is a GZipped TAR file. It’s basically like a .ZIP file like you’d get in Windows. You’ll see a lot of GZip files when you’re working with Linux.
Installing Eclipse
Once the file is downloaded, right-click on it and choose “Extract here”. This will create an eclipse folder that contains the application. You can run Eclipse from any folder, but to keep things organized, let’s move it to /opt/. This is where optional software packages are usually stored.
Since /opt/ is owned by root you’ll have to use sudo at the command line.
amoreno@amoreno-desktop:~/downloads$ sudo mv eclipse /opt/eclipse/
[sudo] password for amoreno:
amoreno@amoreno-desktop:~/downloads$ cd /opt/
amoreno@amoreno-desktop:/opt$ ls -l
total 8
drwxrwxrwx 20 cfserver root    4096 2008-06-06 00:54 coldfusion8
drwxr-sr-x  7 amoreno  amoreno 4096 2008-02-28 00:05 eclipse
We could change the owner of Eclipse to root, but since this is your local development environment, there’s no need to muck with things that far.
Starting Eclipse
Now you can go into /opt/eclipse/ via the command line:
amoreno@amoreno-desktop:/opt/eclipse$ ./eclipse
or through the File Browser and start Eclipse by running the eclipse executable. You can also add Eclipse to your Applications menu.
Right-click on Applications and choose “Edit Menus”. Click on Programming and you’ll see the MySQL entries from Part 3. Click on “New Item”:
- Type: Application
- Name: Eclipse
- Command: /opt/eclipse/eclipse
- Comment: Eclipse IDE
If you click the icon on the left, you can browse to /opt/eclipse/ and select “icon.xpm”. Click “OK” to finish.
Now you can start Eclipse by Applications > Programming > Eclipse.
Your first Workspace
When Eclipse is first run, it will prompt you for a place to create the default workspace. Click on Browse, go into your /home/{username} directory and create a folder called workspace. Select that folder and click “OK”. The workspace field should now contain something like “/home/amoreno/workspace”. Click “OK” to start Eclipse.
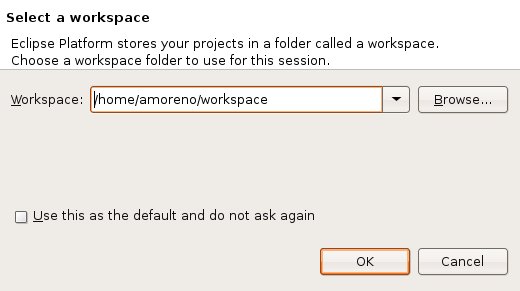
If you don’t check the “use this as default” box, you’ll get this prompt every time you start Eclipse.
Welcome to Eclipse
You should be at a “Welcome” screen. You can close the tab at the top by clicking the “x”. This will reveal the IDE using a Java EE perspective. There are tabbed sections to the left, bottom and right of the main editing area.
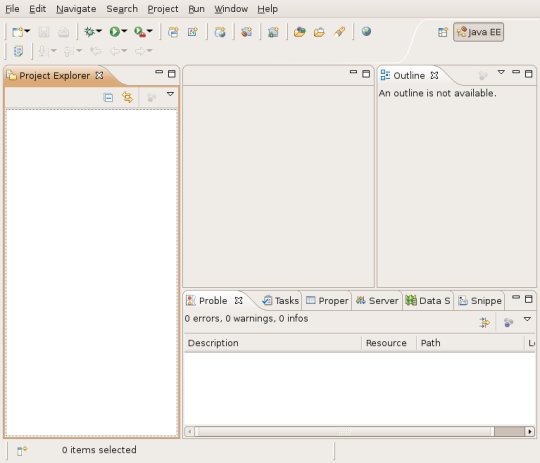
We’ll get into those later. Right now we need to install CFEclipse.
About CFEclipse
The Eclipse IDE has a plug-in based architecture. This allows anyone to create any kind of additional functionality and add it to the IDE. From the CFEcipse homepage:
“Founded in February 2004, the goal of the CFEclipse project is to create a plugin for the Eclipse platform that provides a professional quality IDE for CFML developers. Currently the CFEclipse plugin is one of the top rated Eclipse plugins at Eclipse Plugin Central and is in use by developers across the globe. CFEclipse offers most of the features found in traditional CFML editors and quite a few more that they don’t. As well as allowing developers to take advantage of the wealth of other Eclipse plugins, CFEclipse comes with a developer friendly price tag… It’s FREE!”
Visit the site for a full list of features and tutorials.
Installing CFEclipse
Installing CFEclipse is pretty simple. In the menu at the top of Eclipse, go to Help > Software Updates > Find and Install. Select “Search for new features to install” and click “Next”. Now you’ll see a list of all the currently installed plug-ins in Eclipse.
Click on the “New Remote Site” button. Under Name, enter CFEclipse. In URL, enter http://www.cfeclipse.org/update, the current URL for the CFEclipse project. This can be found on the CFEclipse Download page. Click on “OK” and you should be back at the list of installed plug-ins with CFEclipse checkmarked. Click on the “Finish” button to begin the installation.
Eclipse will check the URL for the latest updates and show you what’s available. Select the top option to select everything.
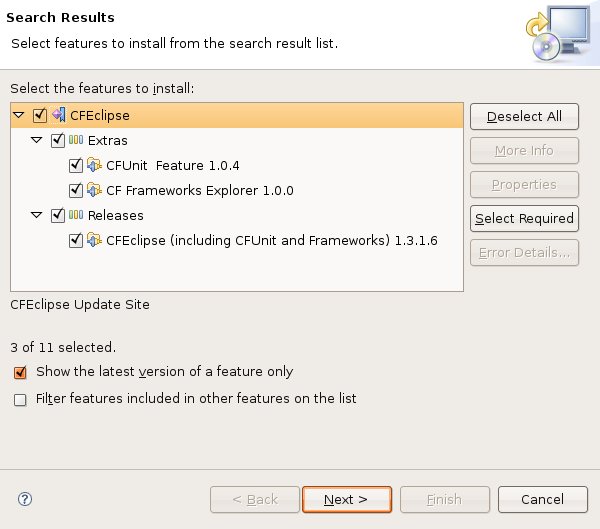
Click on “Next” to continue. Accept the license aggreement and click “Next”. Click “Finish” to begin downloading. Once everything is downloaded, Eclipse will ask you to verify the installation. Click “Install All” and Eclipse will place all the parts into their appropriate folders inside /opt/eclipse/.
Once this has completed, you’ll be prompted to restart Eclipse. Click “Yes” to do so. You’ll be prompted to select a current workspace if you didn’t mark one as default before.
Welcome to CFEclipse
When Eclipse starts, again you’ll have the Welcome screen. Close it and you’ll see the Java EE perspective again.
In the top menu, choose Window > Open Perspective > Other > CFEclipse > OK. The perspective will now change to CFEclipse’s basic layout.
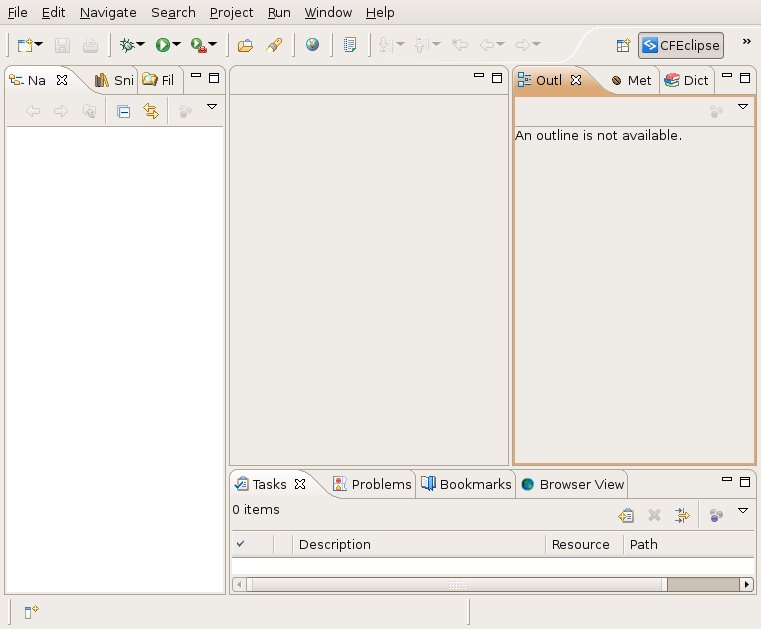
Left-hand menus (tabs)
- Navigator: this will contain Projects and Working Sets
- Snip Tree View: this will contain any snippets of code you create or download
- File Explorer View: for browsing folders and files
Bottom menus
- Tasks
- Problems
- Bookmarks
- Browser View
Right-hand menus
- Outline
- Methods View
- Dictionary View
Using CFEclipse
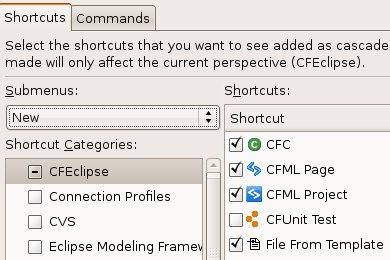
Right now, I’ll cover a few basic functions. First off, go to Window > Preferences > General > Perspectives. Select CFEclipse and click the “Make Default” button. Next, make sure you’re in the CFEclipse Perspective (you’ll see the blue icon in the upper-right-hand corner) and then go to Window > Customize Perspective. In the Shortcuts tab, select “New” from the Submenus drop-down. Select “CFEclipse” from the list on the left, check “CFML Project” from the list on the right and then click “OK”.
Projects
Eclipse is a project-based IDE. A project is just a container for files and folders. In the left-hand menu’s Navigator tab, right-click, choose “New > CFML Project”. The New Project dialog will appear. Enter “Default Apache Website” as the name, use the default location (Eclipse will create the path) and click “Finish”.
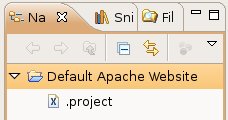
Now we have a container for our project files. But what files are we going to use? Like the name says, we’re going to work with the default website that was created by the Apache installation in Part 1.
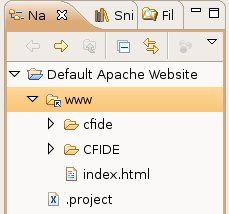
Right-click on the Project Name and choose New > Folder. We don’t want to create a folder under this project’s location. The project is defined under /home/{username}/workspace/, but Apache’s default website is located at /var/www/. So in the New Folder dialog, click on the Advanced button and check “Link to folder in the file system”. Browse to or simply enter “/var/www” and click “Finish”.
Now our Project is “linked” to /var/www. You can see the /CFIDE folder that contains the ColdFusion Administrator files. You’ll also see a /cfide “folder”. Since Linux is case-sensitive, ColdFusion created /cfide as a link (like a Windows Shortcut) to /CFIDE so you can enter eiter case in the URL and get to the CF Administrator.
Right-click in /www and choose New > CFML Page. Enter index.cfm as the name and click Finish.
ERROR
Parent of resource /var/www/untitled.cfm is marked as read-only.
Let’s open up a terminal and see what’s going on.
amoreno@amoreno-desktop:~$ cd /var
amoreno@amoreno-desktop:/var$ ls -l
total 48
drwxr-xr-x  2 root root  4096 2008-06-16 18:01 backups
drwxr-xr-x 19 root root  4096 2008-06-02 23:03 cache
drwxr-xr-x  2 root root  4096 2008-04-04 15:34 crash
drwxr-xr-x  2 root root  4096 2008-04-22 12:26 games
drwxr-xr-x 51 root root  4096 2008-06-12 22:45 lib
drwxrwsr-x  2 root staff 4096 2008-04-14 23:53 local
drwxrwxrwt  2 root root    40 2008-06-16 12:38 lock
drwxr-xr-x 15 root root  4096 2008-06-16 18:01 log
drwxrwsr-x  2 root mail  4096 2008-04-22 12:02 mail
drwxr-xr-x  2 root root  4096 2008-04-22 12:02 opt
drwxr-xr-x 15 root root   620 2008-06-16 18:27 run
drwxr-xr-x  7 root root  4096 2008-04-22 12:08 spool
drwxrwxrwt  2 root root  4096 2008-06-16 17:38 tmp
drwxr-xr-x  3 root root  4096 2008-06-06 00:48 www
amoreno@amoreno-desktop:/var$
Well, the problem isn’t that /var is read-only, it’s that /var/www is owned by the root user and you’re running Eclipse under your user account. Let’s change the owner or /var/www from root to your user account.
The command chown changes the ownership of a file or folder. You have to specify the user (left of dot) and group (right of dot) that will take ownership.
amoreno@amoreno-desktop:/var$ sudo chown amoreno.amoreno www/
[sudo] password for amoreno:
amoreno@amoreno-desktop:/var$ ls -l
total 48
drwxr-xr-x  2 root    root    4096 2008-06-16 18:01 backups
drwxr-xr-x 19 root    root    4096 2008-06-02 23:03 cache
drwxr-xr-x  2 root    root    4096 2008-04-04 15:34 crash
drwxr-xr-x  2 root    root    4096 2008-04-22 12:26 games
drwxr-xr-x 51 root    root    4096 2008-06-12 22:45 lib
drwxrwsr-x  2 root    staff   4096 2008-04-14 23:53 local
drwxrwxrwt  2 root    root      40 2008-06-16 12:38 lock
drwxr-xr-x 15 root    root    4096 2008-06-16 18:01 log
drwxrwsr-x  2 root    mail    4096 2008-04-22 12:02 mail
drwxr-xr-x  2 root    root    4096 2008-04-22 12:02 opt
drwxr-xr-x 15 root    root     620 2008-06-16 18:27 run
drwxr-xr-x  7 root    root    4096 2008-04-22 12:08 spool
drwxrwxrwt  2 root    root    4096 2008-06-16 17:38 tmp
drwxr-xr-x  3 amoreno amoreno 4096 2008-06-06 00:48 www
amoreno@amoreno-desktop:/var$
Go back to CFEclipse, right-click in the “www” folder, choose New > CFML Page and create index.cfm. Now the file will be created and opened automatically in the ColdFusion editor in the center panel of the IDE.
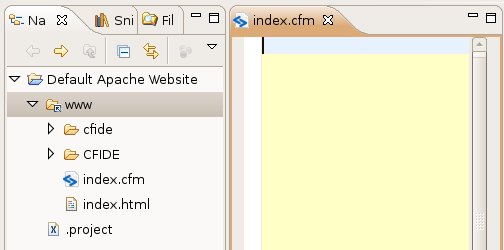
Type “Ctrl+O” to create a set of <cfoutput> tags, then place #now()# between them and save the file.
<cfoutput>#now()#</cfoutput>
Make sure Apache and ColdFusion are running, then go to http://127.0.0.1/. At the end of Part 1, we added index.cfm as the first DirectoryIndex entry for Apache, you should see the current date and time instead of “It works!”, which is in the index.html file.
Developing applications with CFEclipse
If you create a new folder under /var/www, it will be owned by your user account and you can use it as the root folder for any application you choose to develop. In a browser, you’ll have to enter http://127.0.0.1/foldername/ or http://localhost/foldername/ to view the application in each folder.
To sort things out in Eclipse, you can create a New Project for each subfolder of /var/www. As each subfolder’s application grows, you can create “views” of parts of a Project or of parts of multiple Projects by creating what’s called a “Working Set”.
Mark Drew, the current Project Manager for CFEclipse talks about creating Working Sets in this post.
However, I feel it is much easier to keep all my application files under my /home/{username} directory so that I can backup the entire /home/ directory at once. Otherwise, I have to backup this folder and that folder and remember where everything is.
In order to have Apache and ColdFusion read and parse files inside and outside of /var/www/ at the same time, we’ll have to make some configuration changes.
Moving on
In part 5, we’ll go further into setting up Apache, ColdFusion, MySQL and Eclipse so we can start working on a new ColdFusion application in Linux.
Adrian J. Moreno
Adrian is a CTO and solution architect specializing in software modernization. More information