The ACME Guide: 64-bit Ubuntu 8.04 LTS Hardy Heron Edition - Part 3
Posted on June 16, 2008
We’ve got [A]pache and [C]oldFusion installed so far. In part three, we’re installing 64-bit [M]ySQL.
Installing 64-bit MySQL 5
From the top menu, choose System > Administration > Synaptic Package Manager. Enter your password and then Search for “MySQL”. Choose mysql-server which points to the latest available version of MySQL (version 5 as of this writing). Mark it for installation and you’ll get a dialog containing related libraries that will also be installed.
Locate and mark mysql-admin and mysql-query-browser to install the MySQL GUI Tools. Each of these have additional required libraries.
Once everything’s marked, click “Apply” to install.
Verify we’ve got 64-bit MySQL
This works the same as with Apache in Part 1.
amoreno@amoreno-desktop:/usr/sbin$ ls -l my*
-rwxr-xr-x 1 root root 8228872 2008-05-09 11:27 mysqld
-rwxr-xr-x 1 root root 2025264 2008-05-09 11:27 mysqlmanager
amoreno@amoreno-desktop:/usr/sbin$ file mysqld
mysqld: ELF 64-bit LSB executable, x86-64, version 1 (SYSV), for GNU/Linux 2.6.8, dynamically linked (uses shared libs), stripped
amoreno@amoreno-desktop:/usr/sbin$
Configuring MySQL
Once the package have been downloaded and installed, the configuration program with begin automatically. You’ll be asked to create a password for the MySQl root user. Make sure to enter something you’ll remember.
Once you’ve entered and confirmed your MySQL root password, the package manager will complete and MySQL is ready to go.
As with Apache and ColdFusion, MySQL is setup to run automatically when Ubuntu boots up. To change this, go to System > Administration > Services and look for Database server. You should see 3 entries. Unlock the panel, enter your password and deselect the three Database server entries.
Administrating MySQL from the Command Line
Starting MySQL
Open up a Terminal and start MySQL as the root Linux user:
amoreno@amoreno-desktop:~$ sudo /etc/init.d/mysql start
 * Starting MySQL database server mysqld                     [ OK ]
 * Checking for corrupt, not cleanly closed and upgrade needing tables.
amoreno@amoreno-desktop:~$
Log into MySQL Server
Now that the server is started, you can log in via the command line using the root Linux (via sudo) and MySQL user.
Make sure there are no spaces between “-p” and your password.
amoreno@amoreno-desktop:~$ sudo mysql -p{password}
Welcome to the MySQL monitor.  Commands end with ; or \g.
Your MySQL connection id is 8
Server version: 5.0.51a-3ubuntu5.1 (Ubuntu)

Type 'help;' or '\h' for help. Type '\c' to clear the buffer.

mysql>
All commands to MySQL are now made from the mysql> prompt.
Log out of MySQL Server
Easy enough.
mysql> exit
Bye
amoreno@amoreno-desktop:~$
Restart MySQL Server
amoreno@amoreno-desktop:~$ sudo /etc/init.d/mysql restart
 * Stopping MySQL database server mysqld                     [ OK ]
 * Starting MySQL database server mysqld                     [ OK ]
 * Checking for corrupt, not cleanly closed and upgrade needing tables.
amoreno@amoreno-desktop:~$
Stop MySQL Server
amoreno@amoreno-desktop:~$ sudo /etc/init.d/mysql stop
 * Stopping MySQL database server mysqld                     [ OK ]
amoreno@amoreno-desktop:~$
Using the MySQL Administrator GUI Tool
The MySQL Server must be running before you can connect to it with the MySQL Admin tool.
Launch it from Applications > Programming > MySQL Administrator.
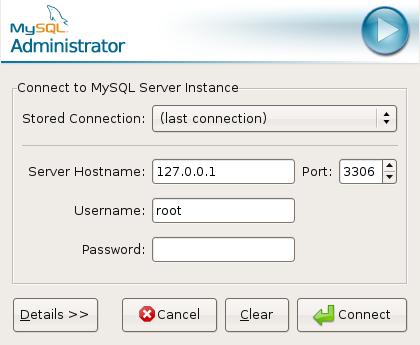
Server Hostname will be 127.0.0.1 or localhost. Username is root. Use the root MySQL password you entered when you first installed MySQL.
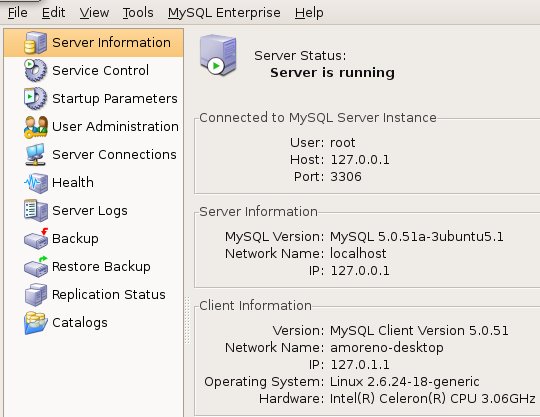
Once you’ve connected to the server, you’ll have a lot of options available. The intro screen has some basic server information.
Create a Database and Database User
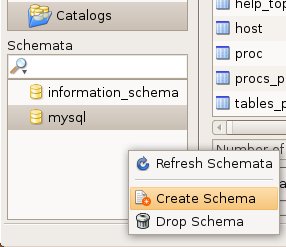
In the MySQL Administrator, click on the Catalogs menu item and right-click in the Schemata section. In the pop-up menu, choose Create Schema and enter a name to create a new database. I named mine “kungfoo”.
Now click on the User Administration menu item above the Catalogs item. At the bottom of the right-hand part of the panel, click on the New User button. Enter a username and password.
Restricting User Privileges
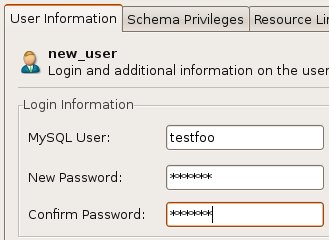
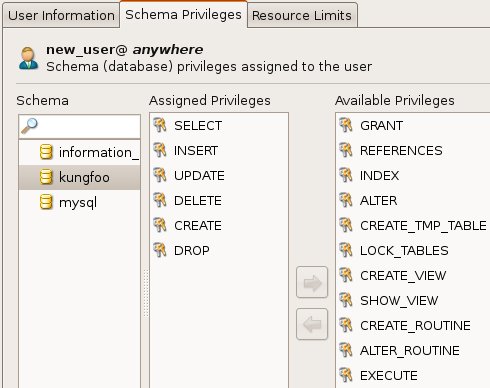
Click on the Schema Privileges tab to associate this user with a database (schema). Choose your new database in the Schema column. In the column Available Privileges, choose what actions you want to make available to this User.
Restricting User Connection Access
When a new user is created, by default the user can connect to a database from anywhere (any IP address). Let’s alter the user’s access location to just your local desktop.
In the User Accounts list in the bottom left-hand part of this screen your user will likely still be listed as new_user. Right-click on your new user’s name and select Add Host. Here you have three choices:
- Any host
- Local host
- Hostname or IP
Select Local host and click OK.
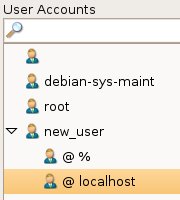
Now you should have 2 hosts listed under your user name. To remove the “anywhere” host, right-click on @ % and choose “Remove Host”. Now your new user can only connect to your new database from your local machine and nowhere else.
Apply changes
If you’ve completed all your user settings, click the “Apply Changes” button on the far right to create your new MySQL user.
ColdFusion and MySQL in a Production environment
When in production, often ColdFusion and MySQL are setup on separate machines. When doing so, you’d want to setup a database user limited to connect from localhost and from the IP address of your ColdFusion server. Alternately, you might setup two database users: One with full privileges that can access from localhost and one with limited privileges that can access from the ColdFusion server’s IP address.
Create a ColdFusion Data Source
Make sure Apache and ColdFusion are running and then log into your ColdFusion Administrator: http://127.0.0.1/CFIDE/administrator/index.cfm
In the left-hand menu, under Data & Services choose Data Sources. Enter a Data Source Name, then in the Driver menu make sure you choose MySQL (4/5). Click the “Add” button to go to the basic data source screen.
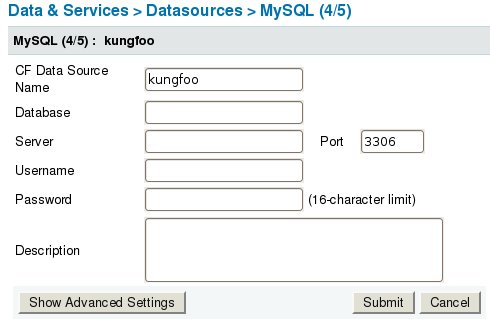
The data source name should be filled in from the previous form. Fill in the basic information for the datasource:
- Database: this is the name of the new schema you created.
- Server: localhost or 127.0.0.1
- Port: 3306 by default
- Username: User associated to your new schema
- Password: That user’s password
Add a description if you like, then click Submit to continue. If everything is correct, you should get “data source updated successfully.” in green at the top of the main Data Sources page, along with an “OK” in the Status column next to your new data source. If not, then check your MySQL database and user settings and try again.

Moving on
Now we have Apache talking to ColdFusion and ColdFusion talking to MySQL. Next up, we’re going to install Eclipse and CFEclipse so we can start writing some applications.
Adrian J. Moreno
Adrian is a CTO and solution architect specializing in software modernization. More information