Installing ColdFusion 10 on OSX 10.8 Mountain Lion
Posted on February 27, 2013
While setting up my Macbook Pro for web development, I was flummoxed by the issues reported by many people trying to setup ColdFusion 10 on OSX 10.8 Mountain Lion, as well as Window 8. Adobe even has a pre-release program to test new installers for both. I can understand having problems with Windows 8, but installing on OSX 10.8 couldn’t have been easier.
Stop that, do this: OSX
Other than my iPhone 4S and iPad (the first one), I haven’t had an Apple computer since my brother and I shared an Apple IIe back in grade school. BTW, that computer still works.
I know some people have issues using OSX when they’ve been in the Windows world for so long. One comment I saw told the poster to “stop thinking in Windows and start thinking in Unix.” Best advice you can get.
I’ve used BSD, Unix and Linux (CentOS, Red Hat, Ubuntu) for around 15 years, so OSX can’t be to difficult, right?
Install Java
This was probably the easiest time I’ve ever had installing Java. I’d installed a 256 GB SSD and a fresh install of Mountain Lion. The original hard drive had a previous version of OSX and Java was already installed. I wasn’t sure if OSX came with Java pre-installed, so I opened up a Terminal, typed “java -version” and hit enter.
OSX responded like Crush from Finding Nemo: “Yo dude, I know you want to see which Java I have. Sorry bro, don’t have it. I could, you know, get it for you if that’s cool. Yeah? Awesome. Just hang loose a minute.” And then, BAM! Java’s installed.
Get Apache up and running
OSX ships with Apache pre-installed. With Mountain Lion, Apple changed how Apache is controlled through the System Preferences. Having never used a previous version of OSX, who cares? Let’s proceed.
Apache can (and should) be controlled via the command line, same as with any *nix operating system, by using “sudo” commands. The first time you call one of these commands, you’ll get prompted for your password.
// Start
sudo apachectl start

// Stop
sudo apachectl stop

// Restart
sudo apachectl restart
You’ll get used to using “sudo” as you get more familiar with Unix. Even when you’re not actually using Unix. (Image courtesy of xkcd.)

One Apache is started, you can go to http://localhost or http://127.0.0.1 and you should see the message “It works!”.
Installing ColdFusion 10
If you haven’t installed ColdFusion before, it’s pretty simple. Simon Free has some excellent instructions and videos over on “Learn CF in a Week”. I also tried Wil Genovese’s instructions for CF10 on Mountain Lion, but he uses a “non-Apple way”, which I couldn’t get to work. For a moment, I considered installing CF10 on MAMP, but I saw something shiny out of the corner of my eye and got distracted.
What was I talking about?
Oh yeah.
You can download the ColdFusion installer from the Adobe website. You’ll have to create an account if you don’t already have one to get the installation file.
Simon’s instructions tell you to use the built in web server, but we want to use Apache. Also, don’t set CF to start automatically when OSX starts. You only want CF running when you want it running.
- Open Finder > Downloads > double-click the
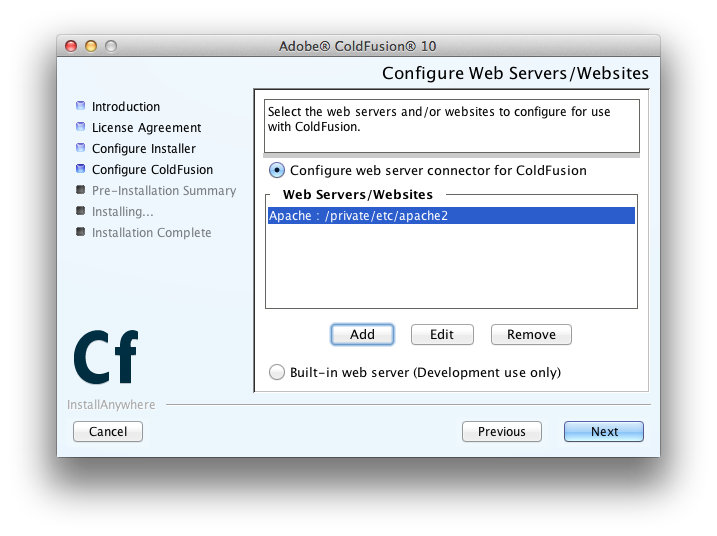
ColdFusion_10_WWEJ_osx10.dmgfile. Introduction:NextLicense Agreement:Accept : NextInstall Type:Developer : NextSubcomponent Installation:Uncheck “Start ColdFusion on system init” : NextEnable Secure Profile:Not for local development : NextRemote Admin Credentials:Meh, not for local development : NextSelect Installation Directory:Use the default, “/Applications/ColdFusion10” : NextEarlier Versions of CF:BORED! : NextConfigure Web Servers:Click on Add
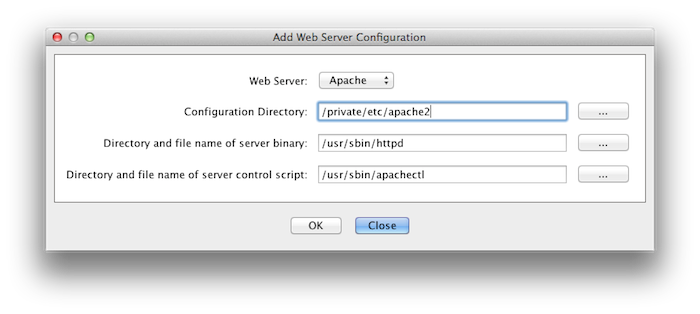
The configuration directory for Apache on Mountain Lion is “/private/etc/apache2”. This is key!
- You should now see this configuration listed : Next
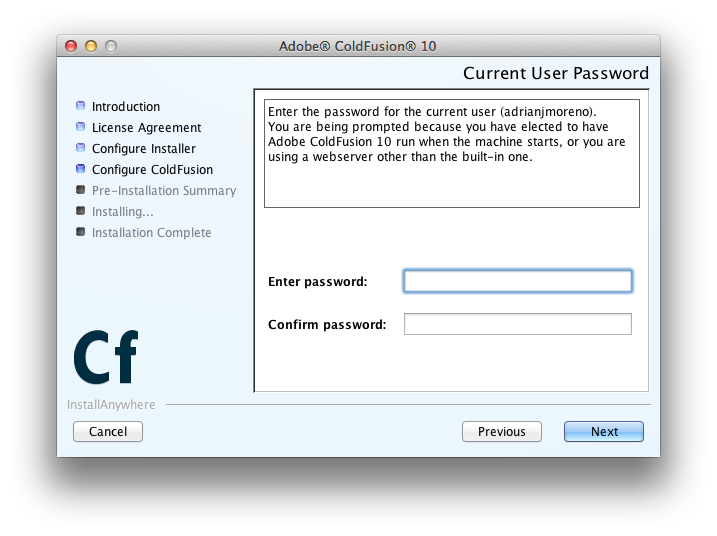
Configure Open Office:I tried to configure Libre Office, but it didn’t work. Skip this unless you need Open Office.Admin Password:Something simple for local development : NextEnable RDS:Only if you want to integrate with ColdFusion Builder and other remote access. Not for Production servers. : NextServer Updates:Yes, please! : NextCurrent User Password:This was surprising, but should have been expected. I’ve never seen this on any Linux installation before. Since I’m not using the built in webserver, I think CF needs to “sudo” to alter the Apache configuration file. This would also have been needed if I had elected to start CF when OSX starts.
Admin Password:Something simple for local development : NextPre-installation summary:NextInstallation Complete:Launch the Configuration Wizard @ http://127.0.0.1/CFIDE/administrator/index.cfm
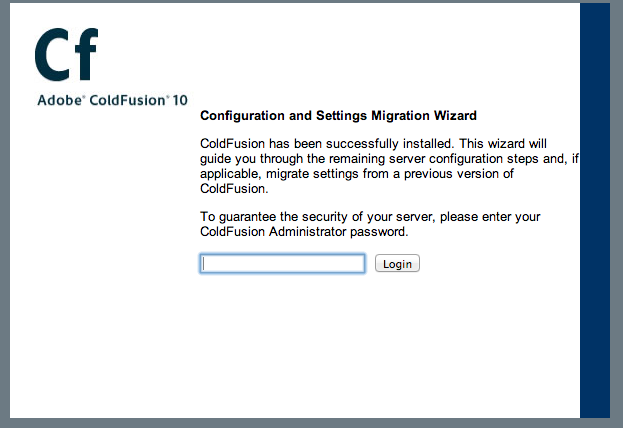
This will finish configuring ColdFusion and log you into the CF Admin.
Manage ColdFusion from the Terminal
Starting and stopping ColdFusion from the terminal is very similar to Apache.
// Start
/Applications/ColdFusion10/cfusion/bin/coldfusion start

// Stop
/Applications/ColdFusion10/cfusion/bin/coldfusion stop

// Restart
/Applications/ColdFusion10/cfusion/bin/coldfusion restart
Chris Simmons shows a few more helpful commands in this blog post.
OSX Sites
Referring back to the cnet article, you can configure a Sites directory in your Home folder in order to develop multiple web sites/applications.
- Open the OS X Terminal utility (/Applicaitions/Utilities/)
- Create and edit an Apache user configuration file named after your user account by running the following command:
sudo pico /etc/apache2/users/whoami.conf
- Copy the following text into the Terminal editor that opens, but be sure to change the “username” text to the short name of your user account:
<Directory "/Users/username/Sites/">
     Options Indexes MultiViews
     AllowOverride All
     Order allow,deny
     Allow from all
</Directory>
- Save and close the editor by pressing Control-O followed by Control-X.
- Stay in Terminal and go to your home directory. Create a folder named
Sites, then create anindex.htmfile in that folder with the contents “I fight for the Users!”. - Start or re-start Apache to pick up these changes.
- You should be able to visit
http://localhost/~username/index.htmand see the contents of the file you just created. - Now create an “index.cfm” file in your Sites folder with this simple content:
<cfoutput>#now()#</cfoutput>
- Visit
http://localhost/~username/index.cfmand you should see the current time.
Now you have a web root folder for your development efforts and you’ve verified that ColdFusion can parse CFML files in your Sites directory.
Apache Virtual Hosts
Often you’ll want to use a local domain like “http://test.site” instead of “http://localhost/~username/test.site”. By enabling Virtual Hosts in Apache, you can create multiple websites with their own domain, pointing to different folders inside the Sites folder.
Rather than write the details here, I’ll just point to this simple example I found which is a breeze to implement.
Start coding
Now that I have Apache, ColdFusion and ColdFusion Builder (see related entry) installed on OSX Mountain Lion. I just need some data stores. MySQL and MongoDB will be a good start.
If you have any questions, feel free to contact me via this website or on Twitter @iknowkungfoo.
Adrian J. Moreno
Adrian is a CTO and solution architect specializing in software modernization. More information